
This is not something I do very often. Most of the pictures you see on the blog are straight out of the camera shot (SOOC). To be honest, I don't have much patience to photoshop all my pictures. So, I work on getting the shot the first time, through the viewfinder.
However, there is a series of shots of Garrett & my nephew that just weren't great because of low light in Noah's room and rapidly moving boys. Since we only see him about once a year it is important to me to have good pictures for Garrett.
Ready for the Show?
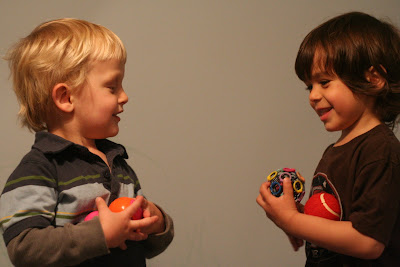
Here is the SOOC shot; not too bad but not great either.
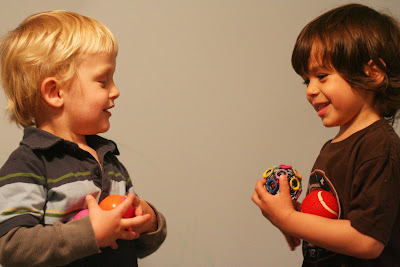
Here is the shot with a little bit of tweaking. I cropped in a bit, brightened it up and very slightly boosted the color. I prefer to have the changes subtle; almost as if you aren't sure anything was done.
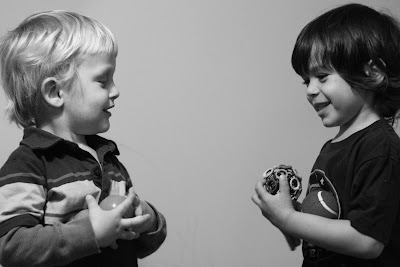
Here is the tweaked shot in black & white. Some shots look great when you convert but this made it boring to me.
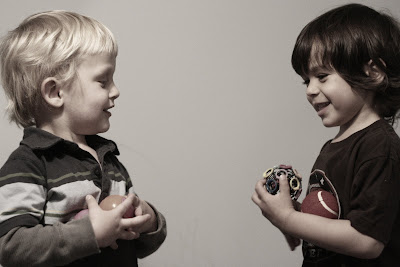
Here is the tweaked shot somewhere in between. To me this has a 70s vintage sepia feel to it.
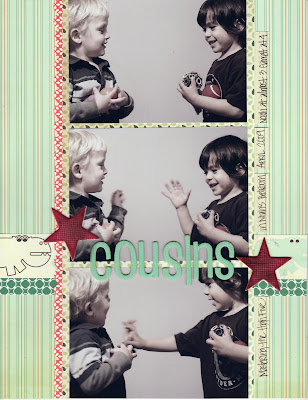
Here is the shot in a layout. I went with the sepia feel and used my Jack & Jill kit from Studio Calico. I've really enjoyed playing with these kits. It stretches my creativity to use product I didn't necessarily pick out. So much fun!
And for the Tell....
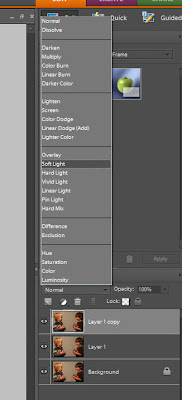
1. I press CTRL J twice to create to new layers of the background. Right above the layers there is a drop down menu that should be on Normal. For the Layer 1 I choose Soft Light & for Layer 1 Copy I choose Screen.
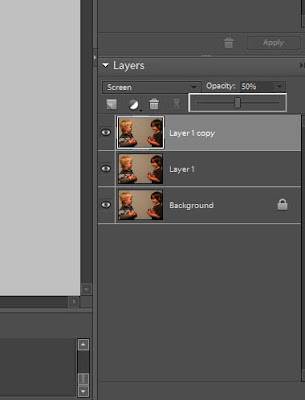
2. Next to the drop down menu is another toggle for opacity. For this series I went with 15% for soft light & 50% for screen.
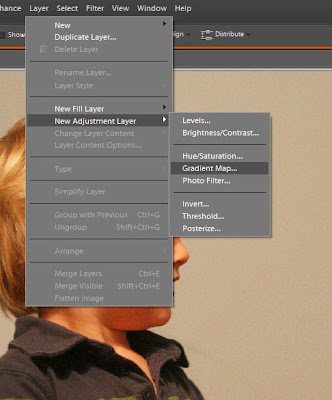
3. Then I go to adjust the colors. I go to the Layer menu at the top and select new adjustment layer, Hue Saturation.

4. For these shots I only adjusted the Master and used 10%. However, if you click on the arrow next to Master you are able to adjust each color individually.

5. Once I've played with the light & colors its time to flatten the image. I right click on the background layer and flatten image. Now you will be able to save as a JPEG.

6. Since my ISO was set so high this came out very grainy. So, I went to Enhance, Unsharp Mask.

7. I keep my setting on 75%, 1, 0. This works for me.

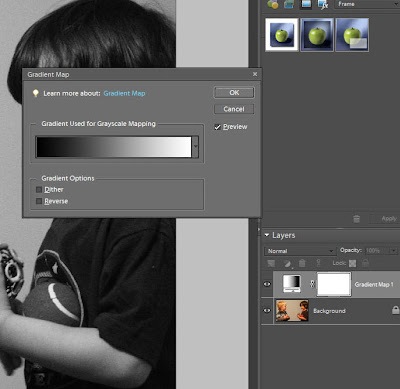
8. At this point I now have my tweaked shot. To convert to black & white I go to Layer, New Adjustment Layer, Gradient Map.
9. I don't do anything here but press OK. Afterwards though you will need to flatten the image to be able to save as a JPEG.
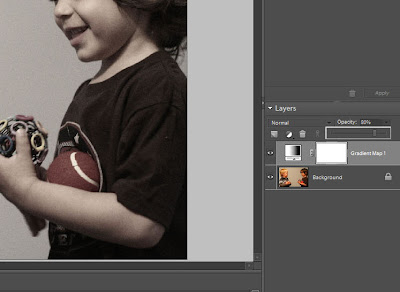
10. In order to get the sepia tone I simply moved the opacity of the gradient map to 80%. Again, make sure you flatten the image to be able to save as a JPEG.
Hope that was helpful!
lovemon


3 comments:
Thanks for the tutorial. I'll have to give this a try. It looks very cool.
wow you're a genius! I just bought a PSE 7 book so I can work on processing raw images better. I'll have to do a show and tell too when I've got it down! ~april
thanks for sharing your secrets. it's very easy to follow. :)
Post a Comment